
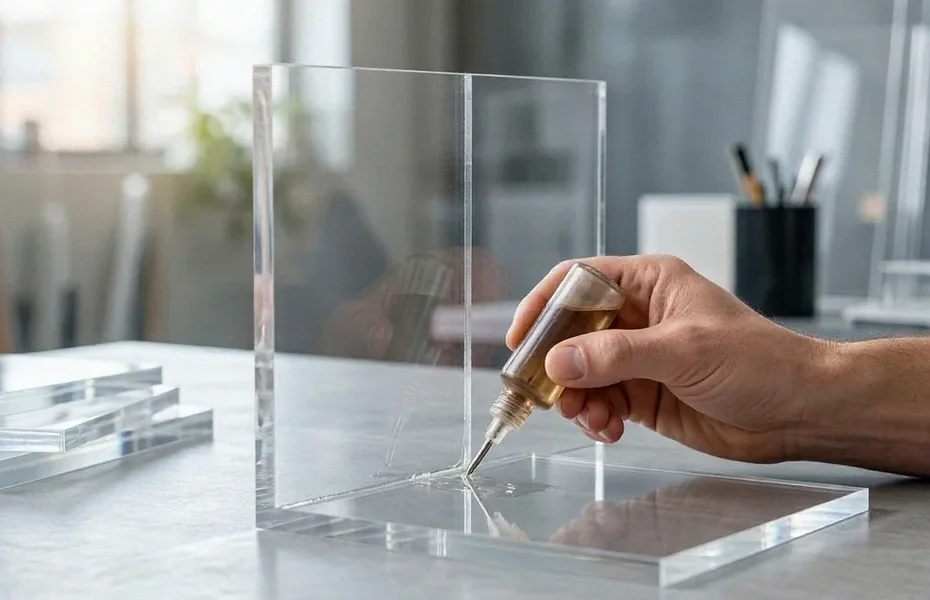
Gluing Acrylic: Solvent Cement Basics
You have spent an hour cutting and sanding a pair of acrylic panels to fit perfectly. You run a bead of superglue along the edge, press them together, and watch a milky white line bloom across the joint. The bond holds, but it looks terrible, and any display case or shelf built from it will never pass as professional work. We have seen this happen in workshops across the UK, and the fix is almost always the same: stop using glue and start using solvent cement. Solvent cement does not sit between two surfaces like an adhesive. It softens the acrylic itself, fusing the panels into one continuous piece of plastic with a bond that is both stronger and effectively invisible.
Why Solvent Cement Beats Adhesives for Acrylic Sheet
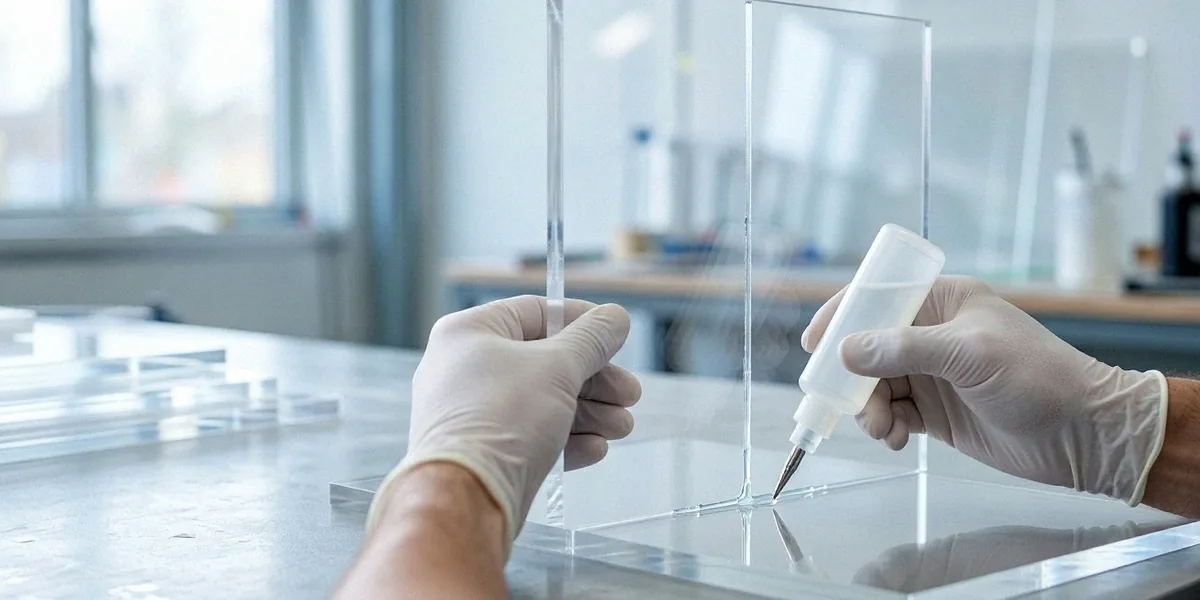
Adhesives such as cyanoacrylate (superglue) and two-part epoxy form a layer between two acrylic surfaces. That layer is a different material with different optical properties, which is why glued joints often show a visible line, yellow over time, or fail under load. Solvent cement works differently. It contains a solvent that temporarily dissolves the surface of the acrylic sheet, allowing polymer chains from both pieces to intermingle. As the solvent evaporates, the plastic re-hardens as a single continuous mass. In practice, a well-made solvent joint on Perspex is as strong as the parent material and completely transparent, which is why it is the standard method for acrylic displays, cases, and point-of-sale units.
How Solvent Cement Works on Perspex
Perspex, like all cast and extruded acrylic sheet, is a thermoplastic. It softens when exposed to solvents such as dichloromethane. When we apply cement to a joint, the solvent penetrates a few thousandths of a millimetre into each surface, turning the edges into a gel-like state. The two gelled surfaces merge, and once the solvent flashes off, usually within minutes for thin cements, the joint sets. Full cure strength develops over 24 to 48 hours at room temperature. Because no third material remains in the joint, light passes through without refraction, giving the seamless look that acrylic fabrication is known for.
When to Choose Solvent Cement Over Cyanoacrylate or Epoxy
We recommend solvent cement whenever the joint needs to be transparent, load-bearing, or exposed to weather and cleaning chemicals. Typical cases include:
- Acrylic display stands, risers, and retail shelving
- Perspex covers, guards, and machine windows
- Aquarium and terrarium construction
- Signage and light diffusers where edge clarity matters
Cyanoacrylate still has a place for tacking small parts or bonding acrylic to metal, and epoxy works well where you need gap-filling strength on dissimilar materials. But for acrylic-to-acrylic joints, solvent cement is the professional choice.
Types of Solvent Cement for Plastic Fabrication
Most solvent cements fall into three families: dichloromethane (DCM) based, ethylene dichloride based, and proprietary blends. DCM cements are fast-evaporating and water-thin, ideal for capillary work. Ethylene dichloride is slower and slightly thicker, giving more working time on larger panels. Proprietary products such as Weld-On 3, Weld-On 4, and Weld-On 16 dominate the UK market, and Weld-On 3 and Weld-On 4 are especially popular solvent cements in the UK. Weld-On is widely available through suppliers like Trent Plastics, along with Scigrip alternatives.
Water-Thin Cements for Capillary Joints
Weld-On 3 and Weld-On 4 are water-thin, fast-setting cements designed for capillary action. You assemble the joint dry, then touch an applicator to the seam and the cement wicks into the gap by itself. These are our go-to choices for clean, tight-fitting edges and for any joint where appearance is critical.
Thicker Cements for Gap-Filling and Vertical Bonds
Weld-On 16 and similar syrupy cements contain dissolved acrylic, giving them gap-filling properties and a longer open time. They are useful for vertical bonds where a thin cement would run out of the joint, for imperfect edges, and for bonding acrylic to other plastics. The trade-off is a slightly more visible joint line.
Essential Safety and Ventilation for UK Workshops
Solvent cement vapours are harmful. Dichloromethane is a suspected carcinogen and can cause dizziness, headaches, and skin irritation. In the UK, COSHH regulations require risk assessments for solvent cement use in workshops, along with suitable controls. In practice, that means nitrile gloves, safety glasses, and local exhaust ventilation at the bonding station. A simple fume extractor with a flexible arm positioned within 30 cm of the joint will capture most vapour before it reaches your breathing zone.
Personal Protective Equipment (PPE) You Actually Need
Forget latex gloves; solvent passes straight through them. Our minimum kit is:
- Nitrile gloves, checked for chemical resistance
- Impact-rated safety glasses or a face shield
- A respirator with an A1 or A2 filter for longer sessions
- An apron or sleeves to protect forearms from drips
Setting Up a Safe Bonding Station
Choose a bench near an open window or under an extraction hood, away from any ignition source. Keep a lidded bin for solvent-soaked rags, and never decant cement into unlabelled containers. Store cement in a cool, locked cabinet, and keep a copy of the safety data sheet within reach. If you can smell solvent while working, your ventilation is not adequate.
Step-by-Step: Making a Clean Capillary Joint
A capillary joint relies on a small, uniform gap between the two acrylic edges, typically around 2mm, so the cement can wick in evenly. Larger gaps starve the joint and cause bubbles; tighter gaps prevent penetration. The technique rewards patience and practice.
Preparing and Cleaning Acrylic Edges
Start by scraping the edges with a sharp blade held at 90 degrees to remove saw marks. For the clearest joints, flame-polish or vapour-polish the edges, but keep the flame moving to avoid overheating. Wipe both surfaces with a clean, lint-free cloth and isopropyl alcohol. Let them dry fully before assembly.
Applying Cement and Clamping Techniques
Assemble the joint dry, using shims or pins to hold the 2mm gap. Apply cement with a syringe or applicator bottle, starting at one end and letting capillary action pull it along the seam. Do not over-apply; a thin, even line is enough. Remove the shims after the cement has gelled, usually within a minute or two, and apply light clamping pressure with tape or spring clamps. Leave the piece undisturbed. Capillary joints typically cure within 24 to 48 hours at room temperature, and we recommend the full 48 hours before any load is applied.
Troubleshooting Common Solvent Cement Problems
Even experienced fabricators run into bubbles, crazing, weak joints, and cloudiness. Most of these issues trace back to edge preparation, humidity, or heat. UK humidity above 60%, common in winter, can cause blushing, the white marks that appear when moisture condenses into the joint as the solvent evaporates. Overheating during flame polishing leads to stress cracks that only show up weeks later.
Fixing Bubbles and Cloudy Joints
Bubbles usually mean the gap was too wide or the cement was applied too fast. If the joint is still wet, you can sometimes draw the cement back out with a syringe and reapply. Once cured, a cloudy joint can occasionally be polished out from the edge, but prevention is far easier. Work in a room below 60% relative humidity, use a dehumidifier if needed, and apply cement in a steady, slow pass.
Preventing Crazing and Stress Cracks
Crazing appears as fine, spider-web cracks inside the acrylic, usually caused by solvent stress or thermal stress. Anneal the acrylic after machining, avoid over-tightening clamps, and never use a naked flame directly on the joint. If crazing appears, the part is usually scrap; the cracks will propagate under load.
Where to Buy Solvent Cement in the UK
We source most of our cement from trade suppliers. Trent Plastics and Simply Plastics are UK suppliers of acrylic sheet and solvent cement, and both stock Weld-On and Scigrip products. RS Components carries smaller quantities for makers who only need a 250ml tin. Local plastic fabrication shops often sell small quantities over the counter, which is handy if you need cement today rather than next week.
Online Retailers and Trade Counters
For online ordering, look for suppliers who ship cement with proper hazardous goods labelling. Weld-On and Scigrip are available online from several UK distributors, and prices vary significantly, so compare before buying in bulk. Trade counters are often cheaper for repeat purchases and let you inspect stock dates.
Cost-Effective Options for Small Makers
If you are just starting out, buy a 250ml tin of Weld-On 3 or Weld-On 4 and a syringe applicator. That setup will handle dozens of small display projects and costs far less than a full trade-size container. Split the cost with a fellow maker if you can, since shelf life is limited once opened.
FAQ
Can I use solvent cement on extruded acrylic as well as cast Perspex?
Yes, but extruded acrylic is more prone to crazing and stress cracking, so use a slower cement such as Weld-On 4 and anneal the finished part where possible.
How long should I wait before drilling or machining a solvent-cemented joint?
Wait the full 24 to 48 hours. Handling after a few hours is fine, but any machining or load should wait until the joint has fully cured at room temperature.
Why did my joint turn white even though I used the right cement?
Blushing is almost always caused by moisture. UK humidity above 60% can cause blushing on solvent-cemented joints, so work in a drier room or use a dehumidifier during winter months.
Do I need a COSHH assessment for solvent cement in my workshop?
Yes. COSHH regulations require risk assessments for solvent cement use in UK workshops, even for small makers. The assessment should cover ventilation, PPE, storage, and spill procedures.
Can I thin Weld-On 16 if it becomes too thick?
We do not recommend thinning proprietary cements. Buy the correct viscosity for the job instead, as adding solvent can affect bond strength and cure time.
Mastering solvent cement takes practice, but the payoff is real. Once you can produce a clean capillary joint on demand, you unlock professional-quality acrylic displays, Perspex fabrication, and custom plastic work for any UK maker or business. Start with a small tin of Weld-On, set up a safe bonding station, and give yourself permission to scrap your first few attempts. The joints you make in a month will be unrecognisable next to the cloudy, weak results you got from glue.