
Cutting Acrylic Without Cracking It: A Guide for UK Makers
You’ve measured twice, clamped your straight edge, run the knife along the line, and then it happens — a hairline crack shoots through the edge of your brand-new acrylic sheet. We’ve seen it in workshops from Cornwall to Glasgow, and it’s almost always the same culprits: too much stress, too much heat, or the wrong grade of plastic. The good news is that cutting acrylic sheet and Perspex cleanly doesn’t require a CNC setup or a decade of experience. It requires understanding how the material behaves and choosing the right tool for the cut. This guide walks you through exactly that, from scoring knives to laser cutters, with practical advice for UK makers and small businesses.
Why Acrylic Cracks (and How to Avoid It)
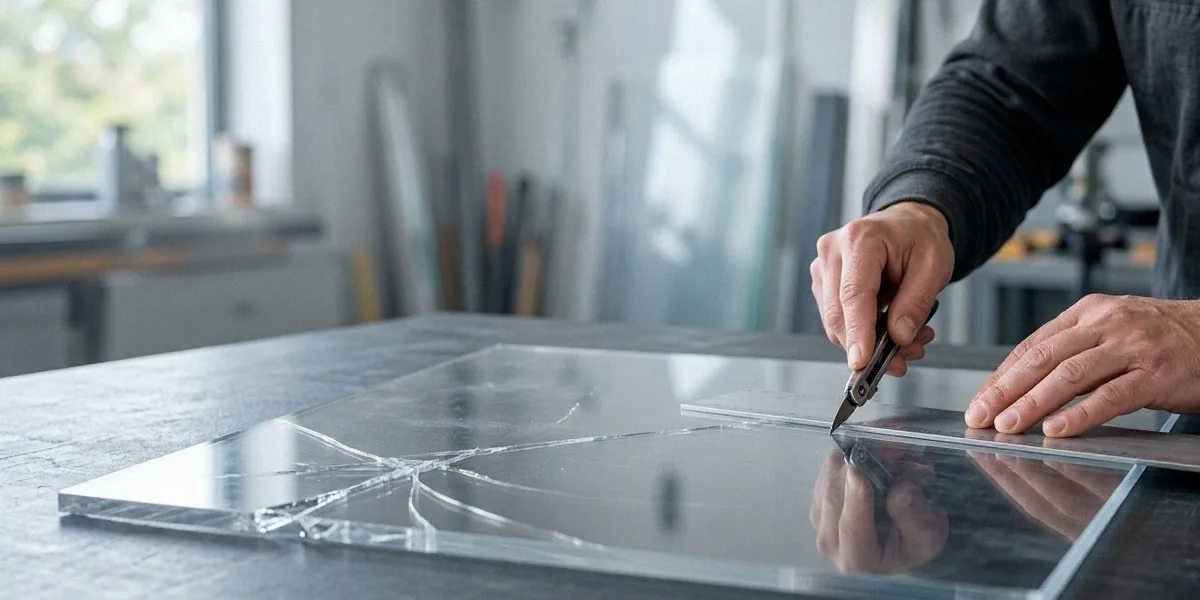
Acrylic is a brittle thermoplastic. Unlike polycarbonate, which bends and absorbs impact, acrylic fractures when stress concentrates at a single point. That stress can come from a blunt blade, a jigsaw blade running too fast, or heat building up in a narrow kerf with nowhere to escape. When the internal stress exceeds the material’s tolerance, you get a crack — often running far beyond the cut line.
The second factor is the acrylic itself. Not all sheet is created equal, and the difference matters enormously when cutting.
Cast vs Extruded Acrylic: What UK Makers Should Know
Cast acrylic is made by pouring monomer between glass plates and polymerising it slowly. Extruded acrylic is pushed through a die in a continuous process. Cast sheet has higher molecular weight, better chemical resistance, and — crucially for us — cuts and machines far more cleanly. Extruded acrylic is cheaper and more uniform in thickness, but it gums up saw blades and chips more readily.
Perspex is a UK brand of cast acrylic sheet, widely available from Perspex Distribution, and it’s the material we reach for when edge quality matters. If you’re buying generic sheet online, check the listing carefully: many budget suppliers sell extruded sheet without labelling it clearly. Cooksongold, a UK supplier of acrylic sheets and jewellery tools, is a reliable source for smaller cast acrylic blanks if you’re working on detailed or display-grade pieces.
The Role of Heat and Stress in Cracking
Friction generates heat, and heat softens acrylic locally. When the softened zone cools, it contracts and pulls against the surrounding material, leaving residual stress behind. That’s why a jigsaw run at full speed through 5mm acrylic often produces a welded, gummy kerf followed by cracks days later. Slow feed rates, sharp blades, and occasional pauses to let the material cool all reduce this risk. Annealing the finished piece in a low oven (around 80°C, then cooling slowly) can relieve internal stress, though most makers skip this for simple cuts.
Essential Tools for Cutting Acrylic Sheet
You don’t need a workshop full of machinery. The right tool depends on the thickness, the shape of the cut, and how many pieces you’re making.
Hand Tools: Scoring and Snapping
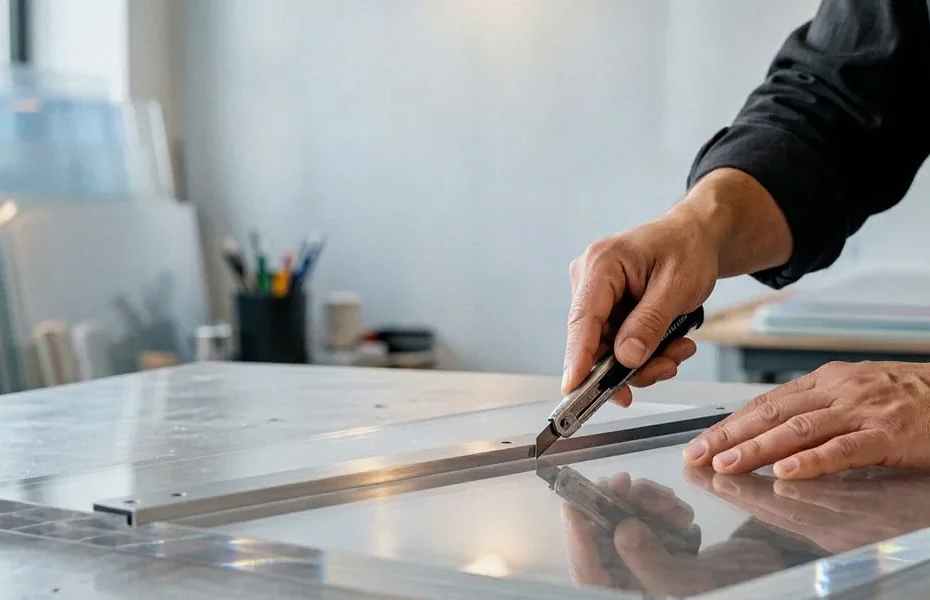
For straight cuts in sheet up to about 4mm, a scoring knife is the fastest and cleanest method. You score repeatedly along a straight edge, then snap the sheet over a dowel or table edge. It produces a near-polished edge with no swarf and no heat. The limitation is obvious: straight lines only, and thicker sheet becomes impractical.
Power Tools: Jigsaws and Circular Saws
For curves, thicker sheet, or repeated cuts, power tools take over. A jigsaw with a fine-tooth blade designed for plastics (look for a low tooth count and minimal set) works well if you keep the speed down. Circular saws handle long straight cuts in thicker sheet but need a blade with a negative rake and plenty of teeth. In both cases, masking tape along the cut line reduces chipping, and a lubricated blade — a little washing-up liquid in water — keeps temperatures down.
Laser Cutting: When to Outsource or Invest
Laser cutting gives you polished edges, intricate shapes, and repeatability that hand tools can’t match. A CO2 laser in the 40–80W range handles most acrylic work up to 10mm. If you only need occasional parts, outsourcing makes more sense than buying a machine. Cut Laser Cut is a UK-based laser cutting service for acrylic that many makers use for one-off display components and prototypes. If you’re producing regularly, a desktop CO2 laser pays for itself within a year.
- Scoring knife: best for straight cuts, 2–4mm sheet, no heat
- Jigsaw with fine-tooth blade: curves and thicker sheet, needs slow speed
- Circular saw: long straight cuts in 5mm+ sheet
- CO2 laser cutter: intricate shapes, polished edges, production runs
Step-by-Step: Cutting Acrylic Without Cracks
Here’s how we approach the two most common jobs: straight cuts and curved cuts.
Straight Cuts with a Scoring Knife
- Lay the sheet on a flat, clean surface and apply masking tape along the cut line.
- Clamp a metal straight edge in place — a steel ruler or aluminium bar works well.
- Draw the scoring knife along the line 8–12 times with firm, even pressure. Don’t rush.
- Align the score over a dowel or the edge of a table and apply steady downward pressure on both sides.
- If it doesn’t snap cleanly, add more score passes rather than forcing it.
The masking tape does double duty: it stops the knife slipping and protects the surface from scratches while you work.
Curved Cuts with a Jigsaw
Drill a starter hole inside the waste area, thread the blade through, and cut towards your line at a slow, steady pace. Use a fine-tooth blade, reduce the pendulum action to zero, and let the blade do the work. If the acrylic starts to melt or squeal, you’re going too fast — stop, let it cool, and resume. Support the offcut so it doesn’t drop and stress the kerf as you finish the cut.
Drilling and Finishing Edges
Use a drill bit designed for plastics with a 60–90° point and low rake. Run the drill slowly, back it out frequently to clear swarf, and clamp the work securely. For finishing, scrape the edge with a sharp blade held at 90°, then wet-sand progressively through 400, 800, and 1200 grit. A final pass with a flame polisher or a quick buffing wheel gives a near-transparent edge. Tensol 12, a UK-made acrylic cement, can be used to fill minor edge imperfections if you’re bonding pieces together afterwards.
Laser Cutting Acrylic: Tips for Clean Edges
Laser cutting produces a flame-polished edge straight off the bed, which is why it’s the go-to method for acrylic displays and retail fittings. But settings matter, and so does material choice.
Choosing the Right Laser for Acrylic
A CO2 laser is the only sensible option for acrylic — fibre lasers won’t cut it effectively. For 3mm cast acrylic, a 40W machine will manage at moderate speed. For 10mm, you’ll want 80W or more. If you’re outsourcing, confirm the service uses a CO2 system; Cut Laser Cut and similar UK services all run CO2 machines suited to cast acrylic.
Settings and Techniques to Prevent Cracking
Cast acrylic lasers far more predictably than extruded. Air assist is essential — it blows away vapourised material and prevents flare-ups that scorch the edge. Masking film on both sides protects the surface from smoke staining. A general starting point for 3mm cast acrylic is 60% power at 15mm/s, but every machine differs, so run test cuts on scrap first. Multiple fast passes at lower power often produce a cleaner edge than one slow, hot pass.
Fixing and Preventing Cracks in Acrylic Displays
Display work is where cracks hurt most — a cracked edge on a retail stand is visible from across the shop floor. Prevention is mostly about design, but repairs are possible if you catch them early.
Repairing Minor Cracks
Tensol 12 is a UK-made acrylic cement that wicks into fine cracks and cures clear. Apply with a syringe or fine applicator, clamp lightly, and leave for 24 hours. For cracks that have propagated more than a few millimetres, stop-drill the tip with a small bit to prevent further travel before cementing. Deep fractures in load-bearing areas usually aren’t worth repairing — replace the panel instead.
Design Tips for Stress-Free Acrylic Displays
Avoid sharp internal corners, which concentrate stress. Radius every internal corner to at least 3mm. Don’t over-tighten fixings — acrylic expands and contracts with temperature, so allow clearance in screw holes. Use flexible adhesives rather than rigid ones where panels meet. Display Products Online, a UK supplier of acrylic displays, designs its standard ranges around these principles, and it’s worth studying how commercial units handle joints before designing your own.
FAQ
Can I cut acrylic with a standard wood saw?
You can, but the result is usually rough. A wood saw’s tooth geometry grabs the acrylic and causes chipping. If you must use one, choose a blade with many small teeth and run it slowly, but a plastics-specific blade will always give a better finish.
Why does my acrylic keep cracking after laser cutting?
Usually it’s extruded sheet rather than cast, or the laser is running too hot and leaving residual stress. Switch to cast acrylic, enable air assist, and try multiple faster passes instead of one slow one.
Is Perspex the same as acrylic?
Perspex is a UK brand of cast acrylic sheet, widely available from Perspex Distribution. Chemically it’s acrylic — the name is a trademark, not a different material.
What’s the best way to cut a circle in acrylic?
For a clean circle, a laser cutter is ideal. If you’re working by hand, use a jigsaw with a fine-tooth blade and a circle-cutting guide, or a hole saw for smaller diameters. Always support the centre waste piece so it doesn’t drop and crack the edge.
Can cracked acrylic displays be repaired invisibly?
Minor cracks can be repaired with Tensol 12 to a near-invisible finish. Larger fractures, especially in load-bearing areas, will always show some trace and are usually better replaced.
Cutting acrylic without cracks comes down to patience and technique far more than expensive equipment. A sharp scoring knife, a slow jigsaw, or a well-tuned laser will all produce clean results if you respect the material’s brittleness and keep heat under control. Before you commit to a final piece, practice on scrap — a few minutes of testing will save you a sheet of Perspex and a lot of frustration. Whether you’re building acrylic displays for a shop or fabricating one-off parts in the garage, the same principles apply.