
Heat Bending Acrylic at Home: A UK Maker’s Guide to Forming Perspex
You’ve just finished cutting a beautiful 3mm acrylic sheet for a retail display, you apply a little heat to make a simple 90-degree bend, and then it happens — a hairline crack snakes across the surface, or the edge turns white and brittle. For many UK makers, that moment is when the project gets boxed up and sent to a professional fabricator instead, often at a cost that wipes out any profit on a one-off job. We’ve been there ourselves. The good news is that heat bending acrylic at home is entirely achievable with a bit of patience, the right equipment, and a proper understanding of how the material behaves. This guide walks through the practical side of forming Perspex and other acrylic sheets, from tool selection to avoiding the classic mistakes.
Why Heat Bend Acrylic? Benefits for UK Makers and Small Businesses
Buying pre-formed acrylic displays is convenient, but it limits you to whatever shapes and sizes a catalogue offers. Paying a plastic fabrication shop for a custom bend is more flexible, yet setup costs and minimum order charges quickly add up for hobbyists and small businesses. Heat bending at home lets you turn flat sheet into shelf risers, brochure holders, protective screens, and exhibition stands on your own schedule.
Cost savings vs. professional fabrication
A single custom-bent acrylic display from a UK fabricator might cost £40–£80 once labour and setup are included. The same part made from a £6 offcut and 15 minutes with a heat gun changes the economics completely, particularly when you’re prototyping or producing short runs. For makers selling at craft fairs or online, that margin matters.
Design freedom for custom acrylic displays
Once you can bend sheet reliably, you stop designing around what’s available and start designing around what your product or stall actually needs. Angled signage, curved menu holders, and bespoke point-of-sale stands all become realistic one-off projects. Perspex is a widely recognised brand of acrylic sheet in the UK, and it’s available in a huge range of colours, thicknesses, and finishes that support this kind of work.
When to choose heat bending over laser cutting
Laser cutting and heat bending aren’t competitors — they’re partners. Laser cutting produces precise flat parts with clean edges, while heat bending adds the third dimension. If your design involves complex outlines, slots, or engraved logos, have those cut first by laser, then bend the flat blank afterwards. If the part is a simple rectangle, a scoring knife and a straight edge may be all you need before bending.
Tools and Materials You’ll Need for Heat Bending Acrylic Sheet
The kit list is shorter than most people expect. A heat gun (Bosch and Makita both make reliable models widely stocked in the UK), a strip heater or a DIY nichrome wire setup, spring clamps, a jig or form, and proper safety gear will cover the majority of home projects.
Choosing the right acrylic sheet: cast vs. extruded
This is the single most important decision. Cast acrylic (like Perspex) is better for heat bending than extruded acrylic because it softens more predictably and resists crazing. Extruded sheet is cheaper and fine for flat laser-cut parts, but it tends to bubble and distort more readily under heat. Sheet thickness also matters: 2mm heats in under a minute, while 6mm may need several minutes of even warming before it moves.
Heat sources: heat gun vs. strip heater vs. oven
- Heat gun: Best for curved bends, localised shaping, and small parts. Requires constant movement to avoid hot spots.
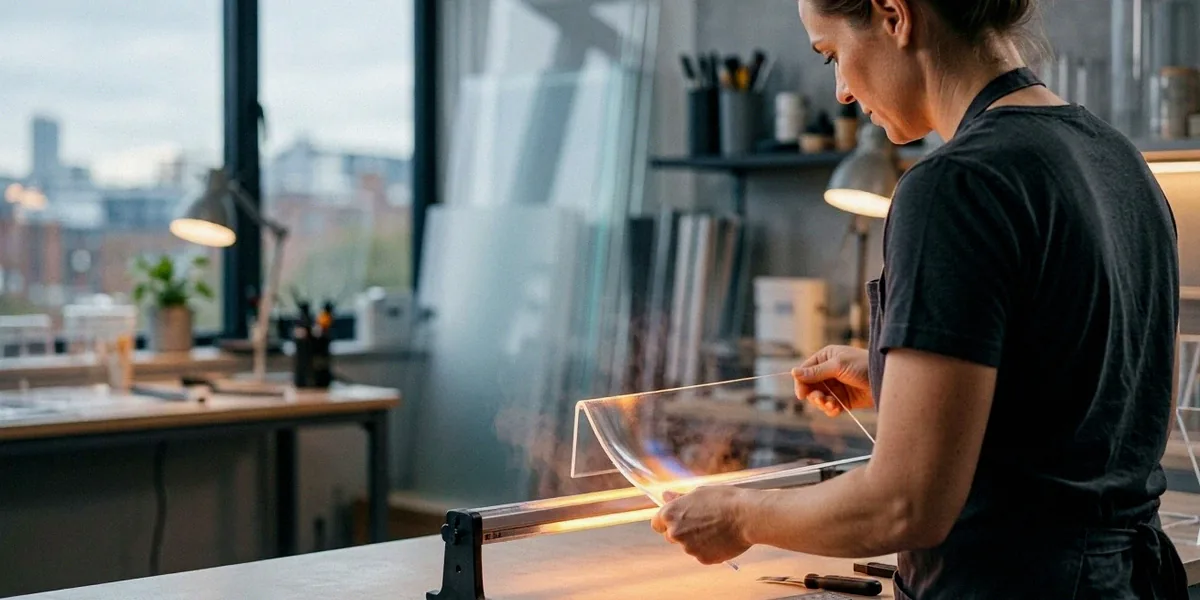
- Strip heater: Ideal for straight, sharp bends along a single line. Commercial units or DIY nichrome wire versions both work well.
- Oven: Useful for large, complex forms where the whole sheet needs to soften evenly. Domestic ovens are tricky to control accurately, so use an oven thermometer.
Safety essentials: ventilation, gloves, and eye protection
Heated acrylic releases fumes that you don’t want to breathe in a closed workshop. Work near an open window or use extraction, wear heat-resistant gloves, and always use eye protection — softened acrylic can snap back unexpectedly. UK safety regulations treat acrylic fumes as a respiratory irritant, so treat ventilation as non-negotiable.
Step-by-Step: How to Heat Bend Acrylic at Home
Once your workspace and tools are ready, the process itself is straightforward. The skill lies in heating evenly and bending slowly.
Preparing your workspace and jig
Mark your bend line clearly with a fine-tip marker, allowing for the material thickness. Set up a jig — a simple pair of clamped wooden battens works for straight bends — so the sheet is supported on both sides of the line. If you’re using laser-cut parts, check that the cut edges are clean before heating.
Heating techniques for even softening
Acrylic softens at around 150–160°C for bending. With a strip heater, position the sheet directly over the element and wait until the line becomes pliable — usually 1–3 minutes for 3mm sheet. With a heat gun, sweep the nozzle steadily along the bend line, keeping it moving to avoid scorching. You’ll know it’s ready when the acrylic sags slightly under its own weight.
Bending and cooling: avoiding common mistakes
Bend slowly and deliberately. Rushing the fold is the fastest route to cracks and stress marks. Hold the bend in position until the acrylic cools enough to hold its shape — usually 30–60 seconds. Don’t quench it in water; rapid cooling introduces internal stress that shows up later as crazing.
Advanced Tips for Perfect Bends and Acrylic Displays
Once the basics are reliable, these techniques push the quality of your work up a level.
Creating curved bends with moulds
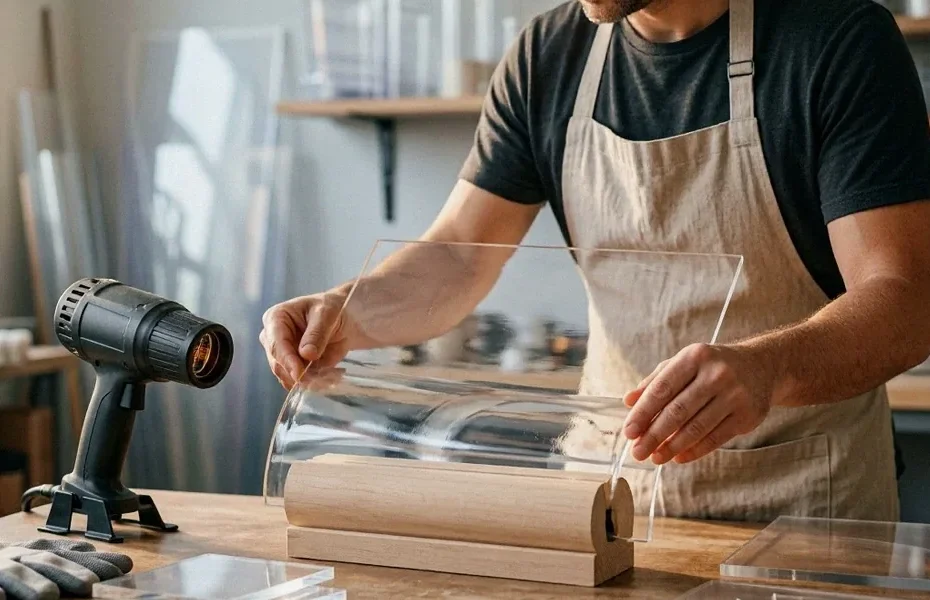
For smooth curves, build a wooden or MDF mould in the shape you want, then heat the acrylic with a heat gun and drape it over the form. Clamp or weight it gently until cool. This is how most bespoke acrylic displays for retail and exhibitions are made.
Annealing for stronger, clearer bends
Annealing relieves the internal stress created during bending. Place the finished part in an oven at around 80°C for an hour per 3mm of thickness, then cool it slowly. It adds time but dramatically reduces the risk of future cracking.
Finishing edges after bending
Laser-cut edges are usually clean enough to leave, but hand-cut edges benefit from scraping and polishing. A fine file followed by progressively finer wet-and-dry paper and a plastic polish produces a near-flame-polished look.
Common Mistakes and How to Avoid Them
Most failed bends fall into three categories, and all are preventable.
Overheating and bubbling
If the acrylic starts to bubble or turn glossy-wet, you’ve gone past the working range. Pull the heat away immediately. Bubbles are permanent and ruin the optical clarity of the sheet.
Uneven heating and crazing
Perspex can craze — developing fine surface cracks — if heated unevenly. Keep the heat source moving and heat both sides of the sheet where possible.
Springback and dimensional errors
Acrylic springs back slightly after bending, so overbend by a few degrees to hit your target angle. Account for this when setting up your jig, especially on tight 90-degree folds.
Where to Buy Acrylic Sheet and Supplies in the UK
We recommend sticking with reputable UK suppliers who stock cast acrylic and offer cutting services.
Online retailers and local plastic fabrication shops
Trent Plastics, Simply Plastics, and Cut Plastic Sheeting all supply Perspex and generic cast acrylic in a wide range of thicknesses. Local fabrication shops are worth visiting for offcuts and advice.
Laser cutting services for pre-cut parts
Many of these suppliers offer laser cutting as an add-on service, which is ideal if you want precise flat parts delivered ready to bend. Laser cutting is often used to pre-cut acrylic parts before heat bending, saving hours of manual work.
Cost considerations for hobbyists vs. businesses
Hobbyists should start with 3mm cast acrylic offcuts. Businesses producing repeat items should buy full sheets and consider a strip heater as a permanent workshop fixture.
FAQ
Can I heat bend acrylic with a hairdryer?
A hairdryer rarely reaches the 150–160°C needed to soften acrylic properly. A heat gun is a far more reliable choice for home bending.
What’s the difference between Perspex and generic acrylic sheet?
Perspex is a brand name for cast acrylic sheet, widely recognised in the UK. Generic cast acrylic behaves similarly, but extruded sheet is noticeably harder to bend cleanly.
How thick can I bend at home?
Most home setups handle 2mm to 6mm comfortably. Anything above 6mm needs longer, more even heating and is better suited to a strip heater or oven.
Do I need to anneal every bend?
Not always, but annealing is strongly recommended for parts that will bear load or be exposed to temperature changes, as it reduces the risk of stress cracking.
Heat bending acrylic at home is a skill built through repetition, not expensive equipment. Start with small test pieces of cast Perspex, get a feel for how the material moves at 150–160°C, and only then move on to complex acrylic displays. With the right tools, decent ventilation, and a bit of patience, UK makers can produce professional-quality formed acrylic without ever sending a job out to a fabrication shop.